
Creating and Working with a Kanban Board Using Jira
Jira is a wonderfully versatile tool that can be used to track your Agile and Kanban initiatives. There can be a little bit of a learning curve to the software if you don’t typically use tracking software or are better acclimated with physical boards. For the most part, though, Jira is easy and intuitive to use. It also has several advantages over using physical boards, such as its graphing capability.
This tutorial will show you how to create a Kanban board using Jira, add issues/tickets to your Kanban board, move those issues around on the Kanban board, and get a cumulative flow diagram automatically from your Kanban board.
A. Creating Your Kanban Board
- Create Your Project
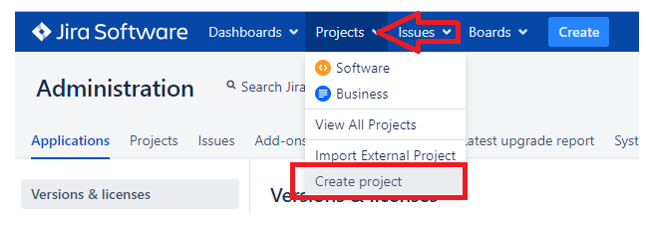
At the top of your screen, find the dropdown menu item that says, “Projects.” Click on “Create project” underneath of that dropdown.
- Select Your Project Type
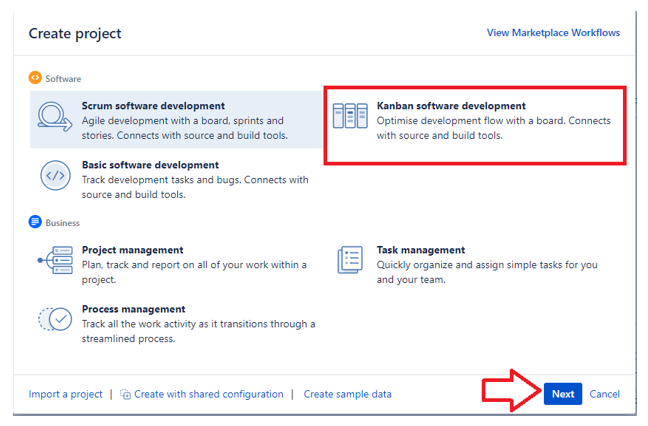
A screen will pop up that will let you choose the type of project that you wish to start work on. Depending on the Jira version and what additional tools you have access to, you may have different options. If you do not have an option for Kanban, you may need to get access to the Jira Software package.
Click on “Kanban Software Development,” and then click “Next.”
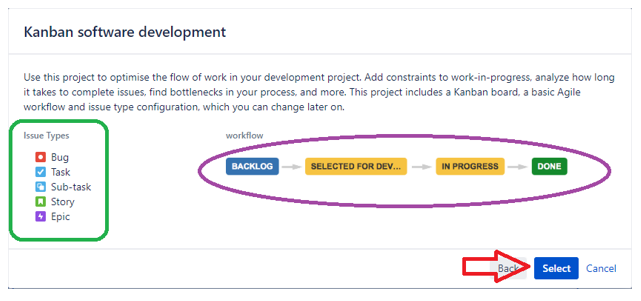
The next screen you see will just show you which Issue Types and Workflow names are available to you. These are customizable, but this process is not covered in this tutorial. Just click “Select” on the below screen.
- Name Your Project
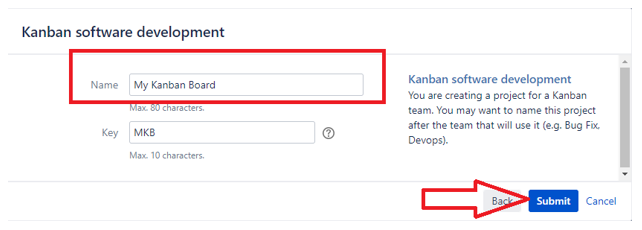
On the next screen, you will need to enter a unique name for your Kanban project. You don’t need to worry about the “Key” field unless you want to. Jira will auto-populate the “Key” field for you. When finished entering the name, select the “Submit” button.
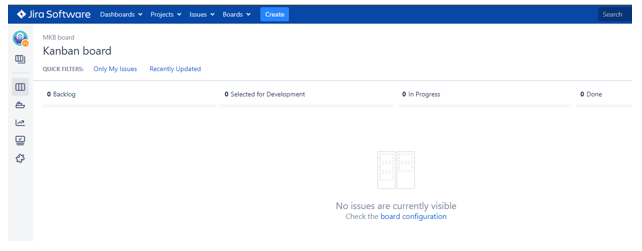
That is all there is to it. You now have a new Kanban Board ready to go. Continue reading to work with issues/tickets and learn how to create a Cumulative Flow Diagram for your Kanban board in Jira.
B. Working with Issues On Your Kanban Board
Issues in Jira may sometimes be referred to as tickets. Jira calls them issues, but they generally serve the same purpose as a ticket in some other applications. Issues (or tickets) are a way to track work in Jira. You begin with a blank board, now you need to fill it up with the work you are planning on doing for the project. You do not need to add all of your work at one time. Jira works well with progressive elaboration. Work can be added when it comes into scope, or when you believe you know enough about the work to add it to the Kanban backlog.
- Create an Issue
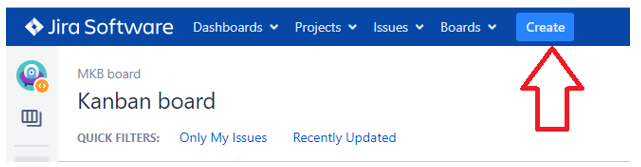
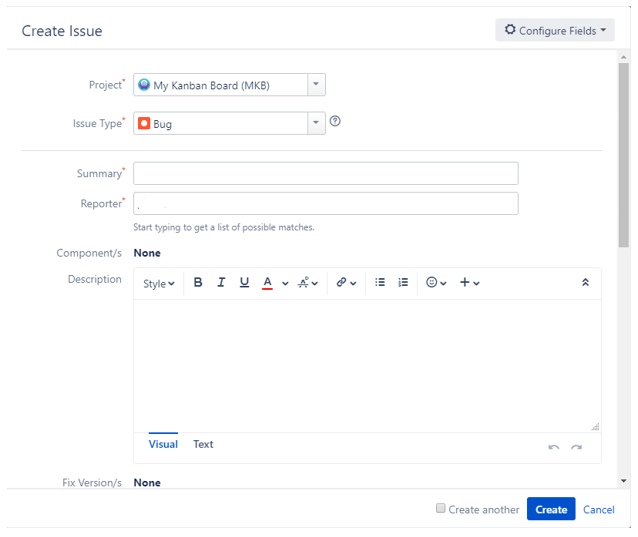
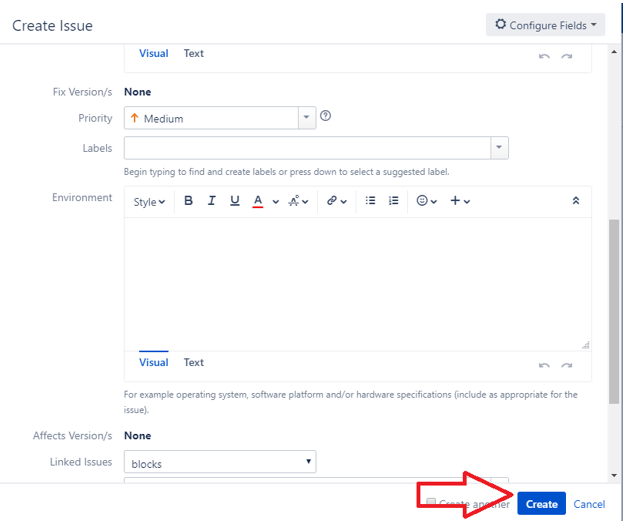
At the top of the Jira screen, find the “Create” button and click it. The below images show the ticket screen that comes up after clicking on “Create.” on that screen, you enter in the issue type (Bug, Epic, Task, Story are default issue types), A summary of the issue, a name if you choose an Epic, a description, and other related information for the issue.
When finished, click the “Create” button on the lower right-hand side.
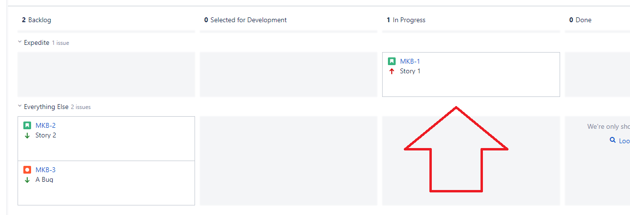
After clicking the “Create” button, you can choose to add more issues. Add as many issues as you need. Issues by default will start in the “Backlog” column of your Kanban board.
- Move Issues Between Columns.
For tracking in Kanban, your issues will move from the backlog to the other columns as they are worked on and pass through the Kanban workflow. Each column represents a stage in the workflow. There are a couple of different ways to move issues between columns. Use the method that works best for you.
Method #1:
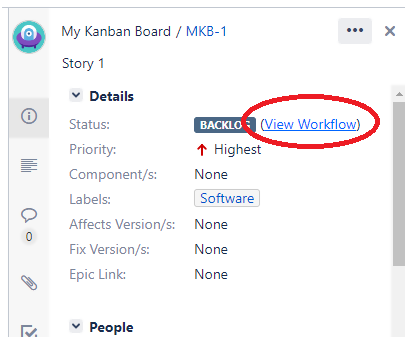
Click on the issue name (blue text within the issue). A screen will slide out that shows the details related to that issue. Click on the “View Workflow” link in the Status field on that screen.
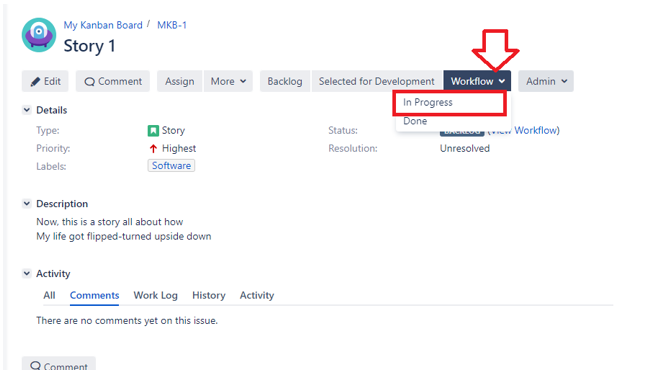
From the View Workflow screen, you can move the issue between the columns. You can select the issue for development, or click the “Workflow” dropdown and choose “In Progress” or “Done.” These correspond to the workflow names associated with the Kanban board. If you are using a modified Workflow, these names will be different.
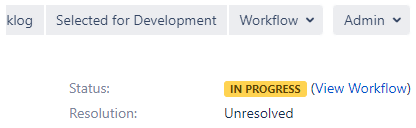
Once you change the workflow, it will automatically update the issues assigned Status.
Method #2:
Remain on the Kanban board screen. Click and hold your mouse button on the issue you want to move and drag it to the new column. Issues can be dragged and dropped.
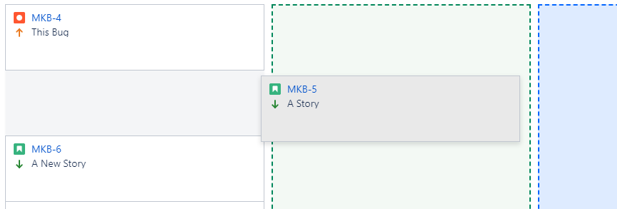
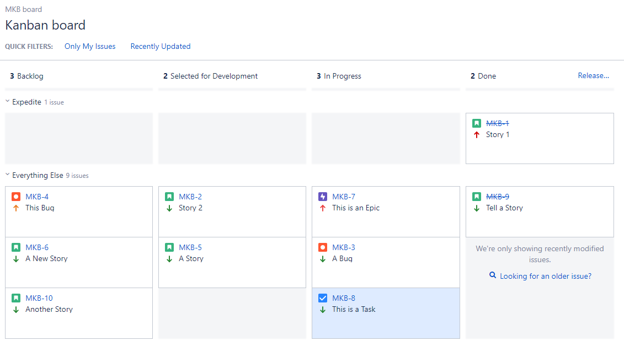
- View the Kanban Board to See Items
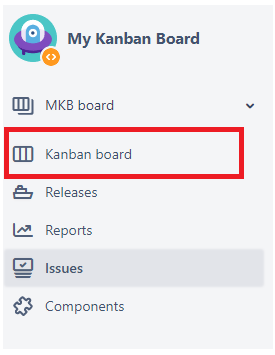
For Method #1 above, you can navigate back to the Kanban board by clicking on it from the menu on the left side of your Jira Screen. For Method #2, you should already be on the Kanban board.’
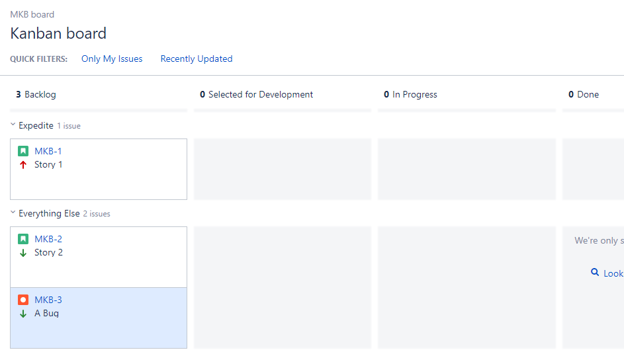
Verify that issues are where they are needed to be. Our moved issue from Method #1 is shown below.
C. Retrieve a Cumulative Flow Diagram (CFD)
Jira provides options to create many different charts and graphs for your project. You can choose to use them or ignore them. For Kanban, a commonly used chart type is a Cumulative Flow Diagram or CFD. Jira will create this chart for you, based off of your Kanban board.
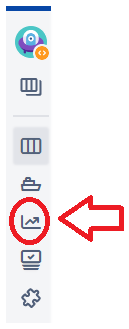
- Navigate to the Chart Scree
On the left-hand side of your Jira screen, click the graph icon.
- Choose Your Graph Type
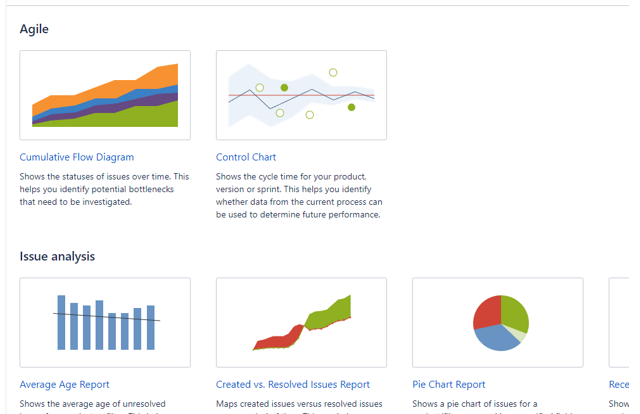
The screen above shows a sample of different possible charts. Jira can create these charts for tracking issues related to Lean Six Sigma in manufacturing to Agile software projects. Choose the appropriate graph(s) for your project. In this case, we will select the Cumulative Flow Diagram. The graph below represents a Kanban board with very few issues.
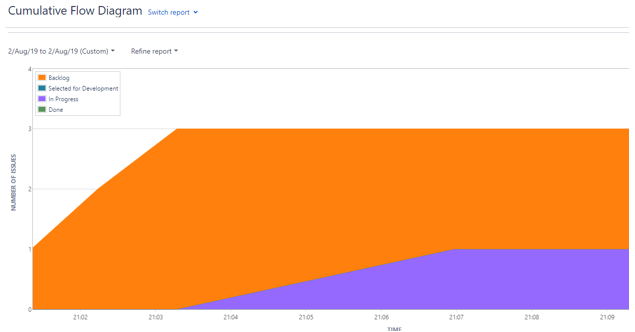
As you add issues and begin moving them through the workflows, you can simply come back to this page and view an updated Cumulative Flow Diagram.
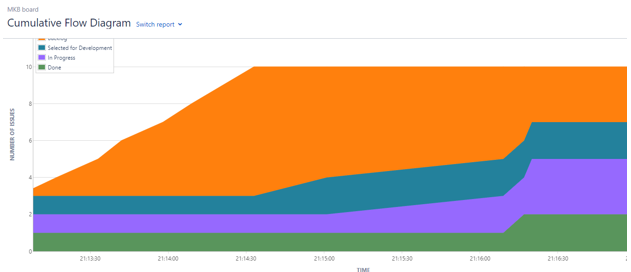
The above Kanban board has several more issues added to it, and the issues are moving through the workflows. The below Cumulative Flow Diagram shows this board graphically.
And that wraps up this tutorial on how to create and work with a Kanban board using Jira.